Okta
Create an Okta OIDC web app integration for Proliferate SSO.
Use an Okta OIDC application to sign in to Proliferate.
Prerequisites
- Access to an Okta org with permission to create an app integration.
- The Redirect URI from your Proliferate Single sign-on settings.
Create the OIDC application
- In the Okta Admin Console, go to Applications → Applications and click Create App Integration.
- Choose OIDC - OpenID Connect as the sign-in method.
- Choose Web Application as the application type, then click Next.
- Configure the general settings:
- App integration name: e.g.
Proliferate. - Sign-in redirect URIs: paste the Redirect URI copied from
Proliferate, e.g.
https://app.proliferate.com/auth/sso/oidc/callback. - Sign-out redirect URIs: leave empty (not required).
- App integration name: e.g.
- Under Assignments, select the Okta users or groups allowed to use the integration, then Save.
- From the application's General tab, copy the Client ID and Client secret.
- Find your Issuer URL under Security → API → Authorization Servers and copy the issuer's Issuer URI.
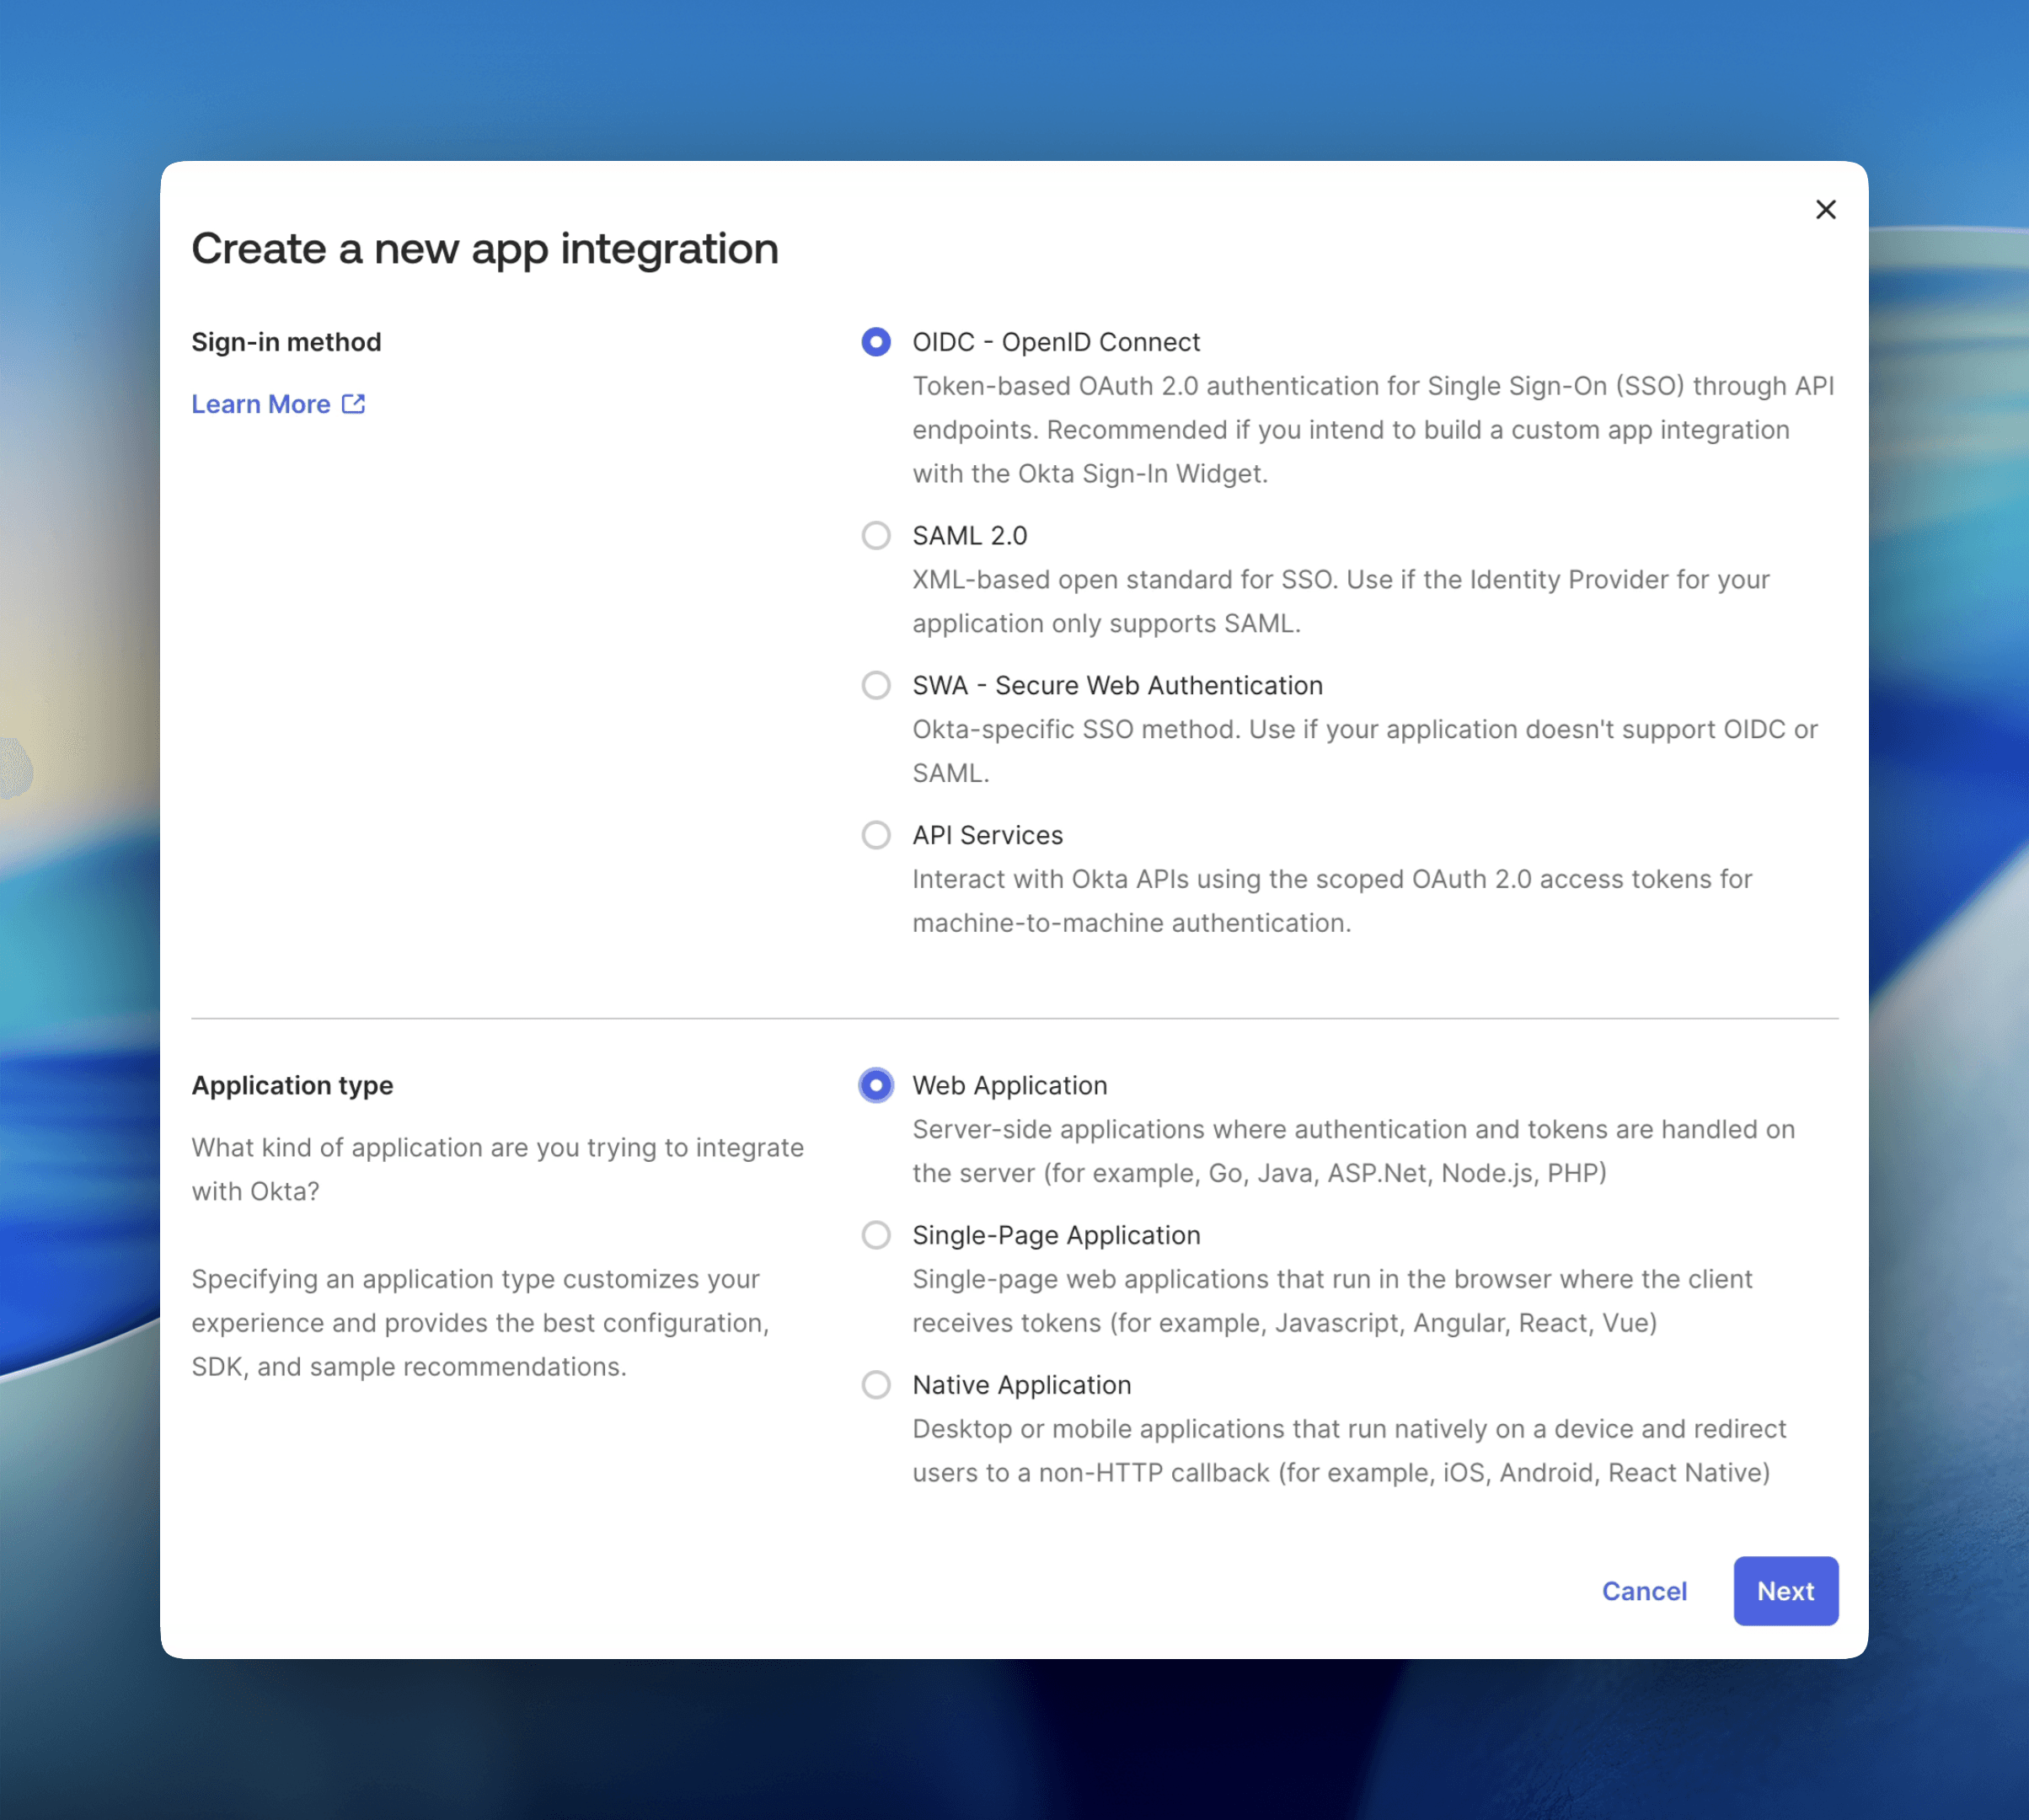
Choose OIDC – OpenID Connect and Web Application.
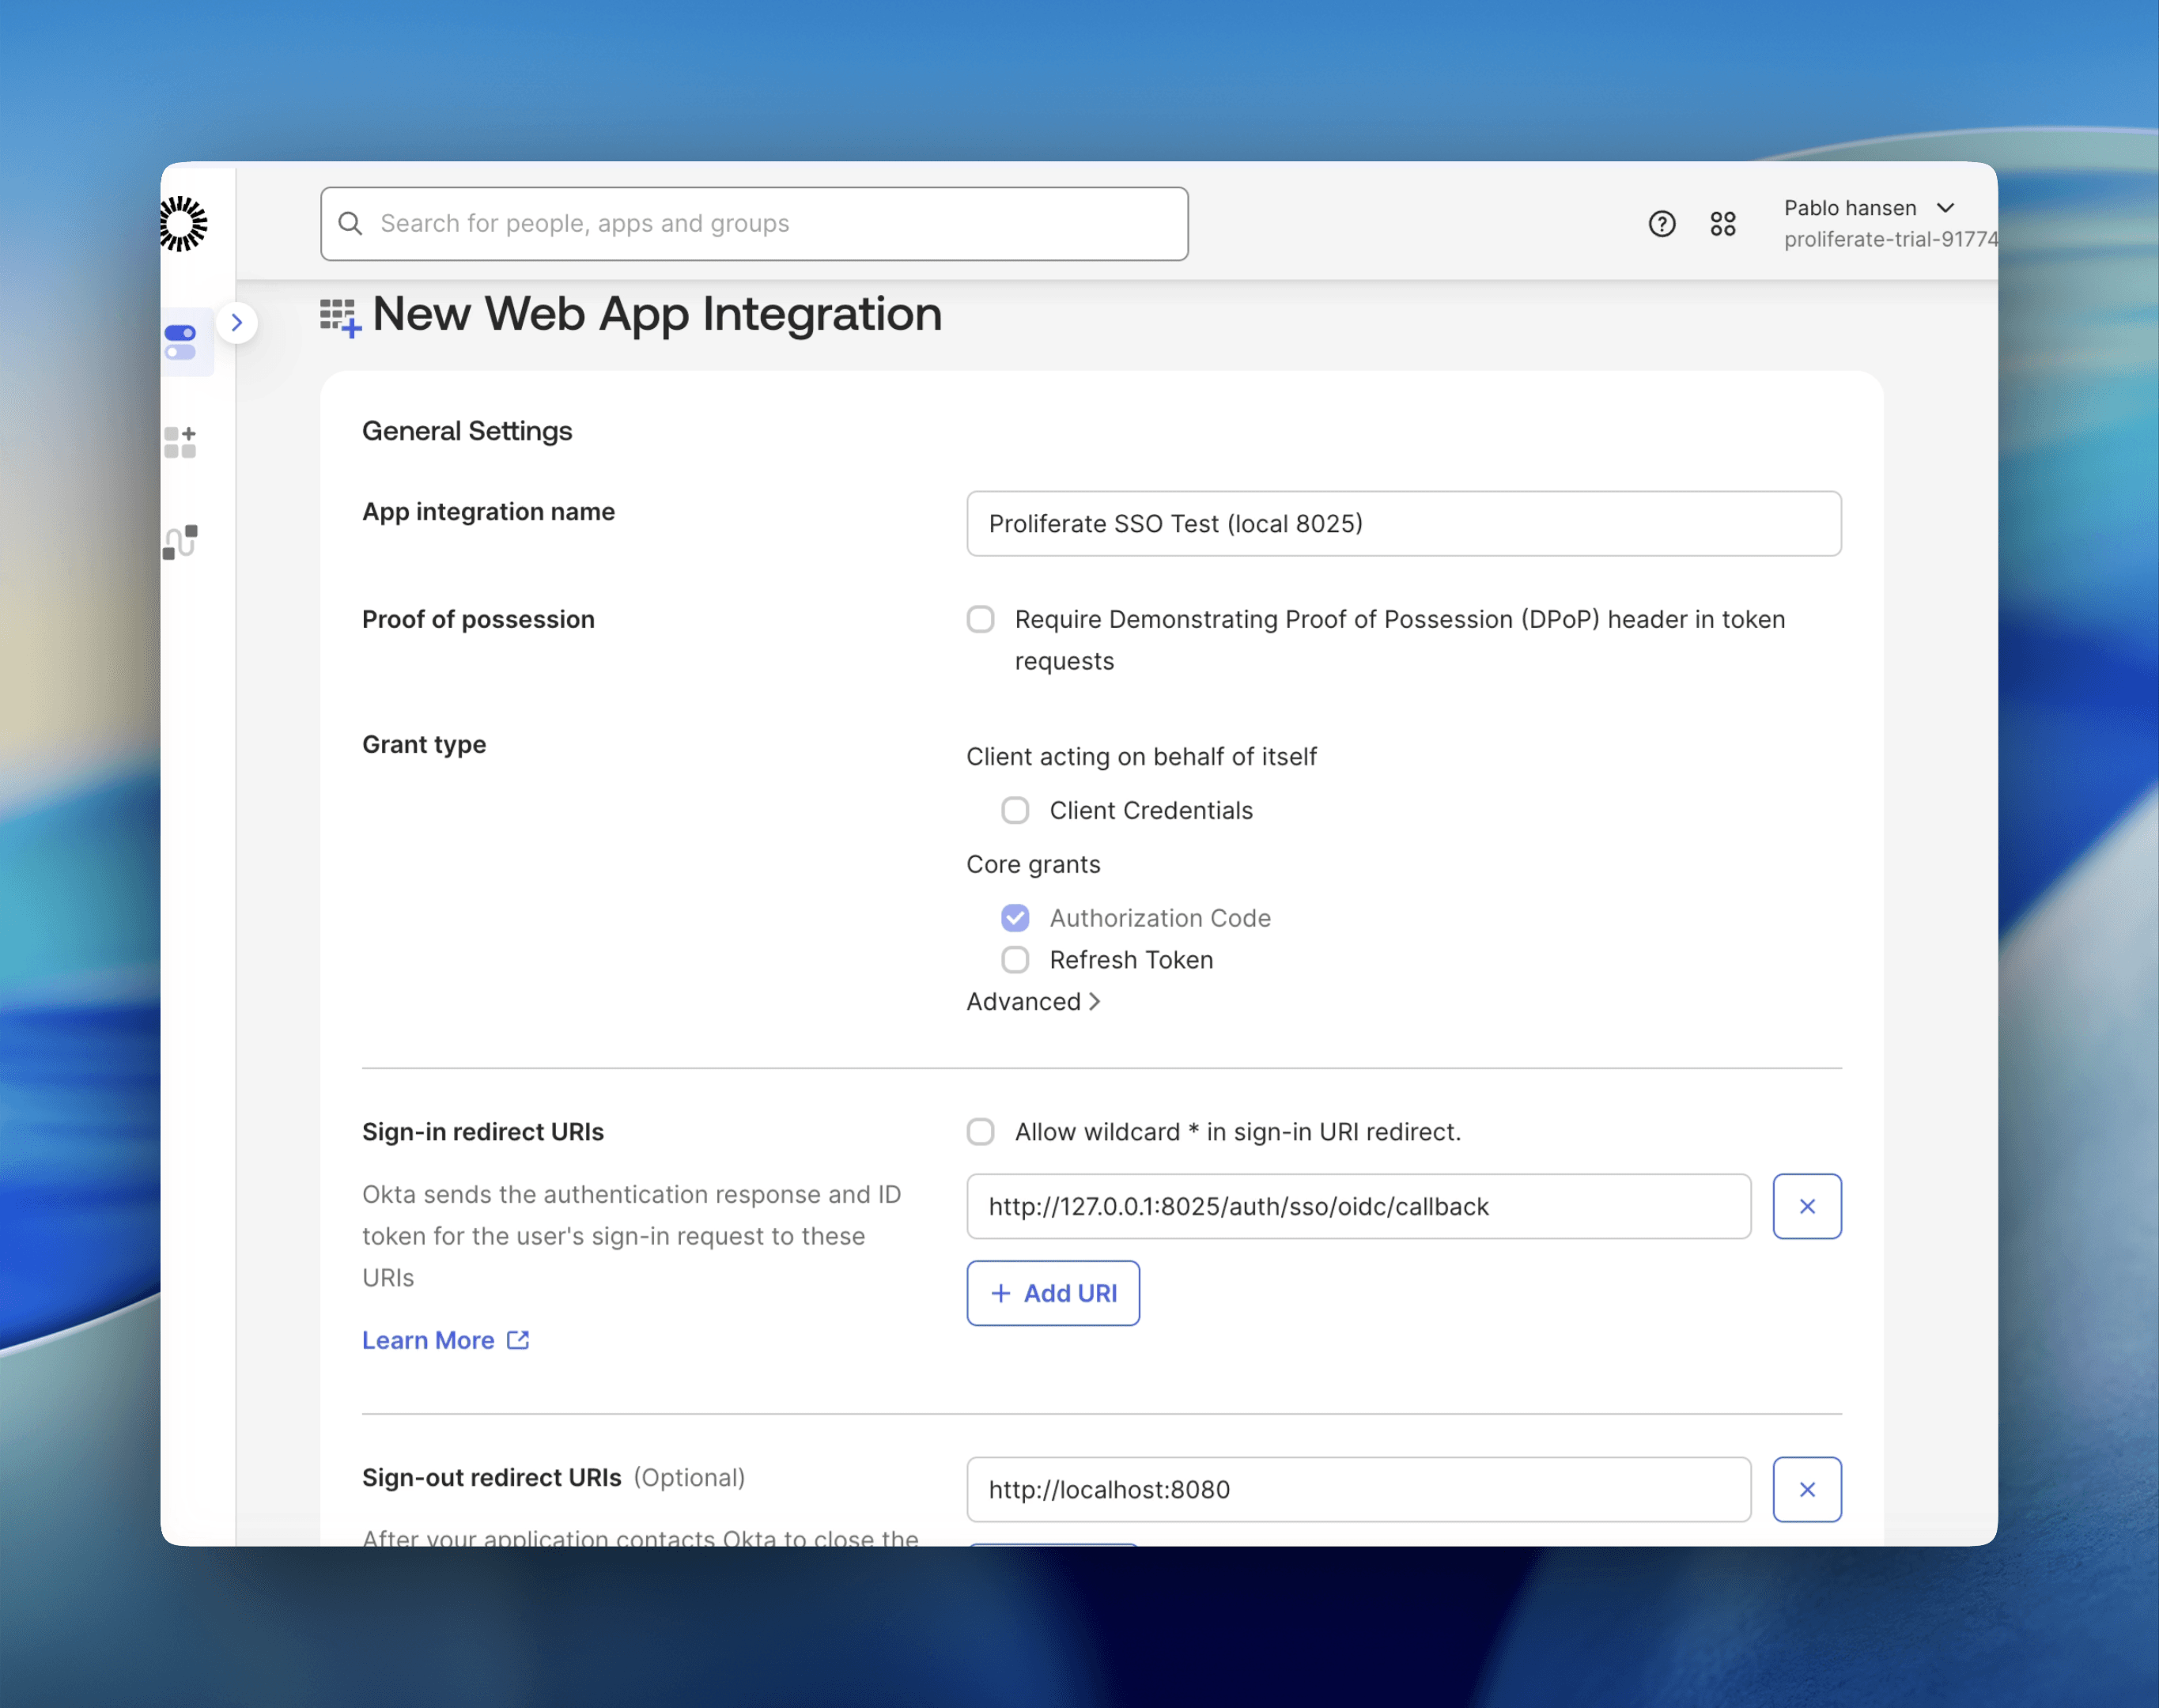
Set the app name and the Sign-in redirect URI.
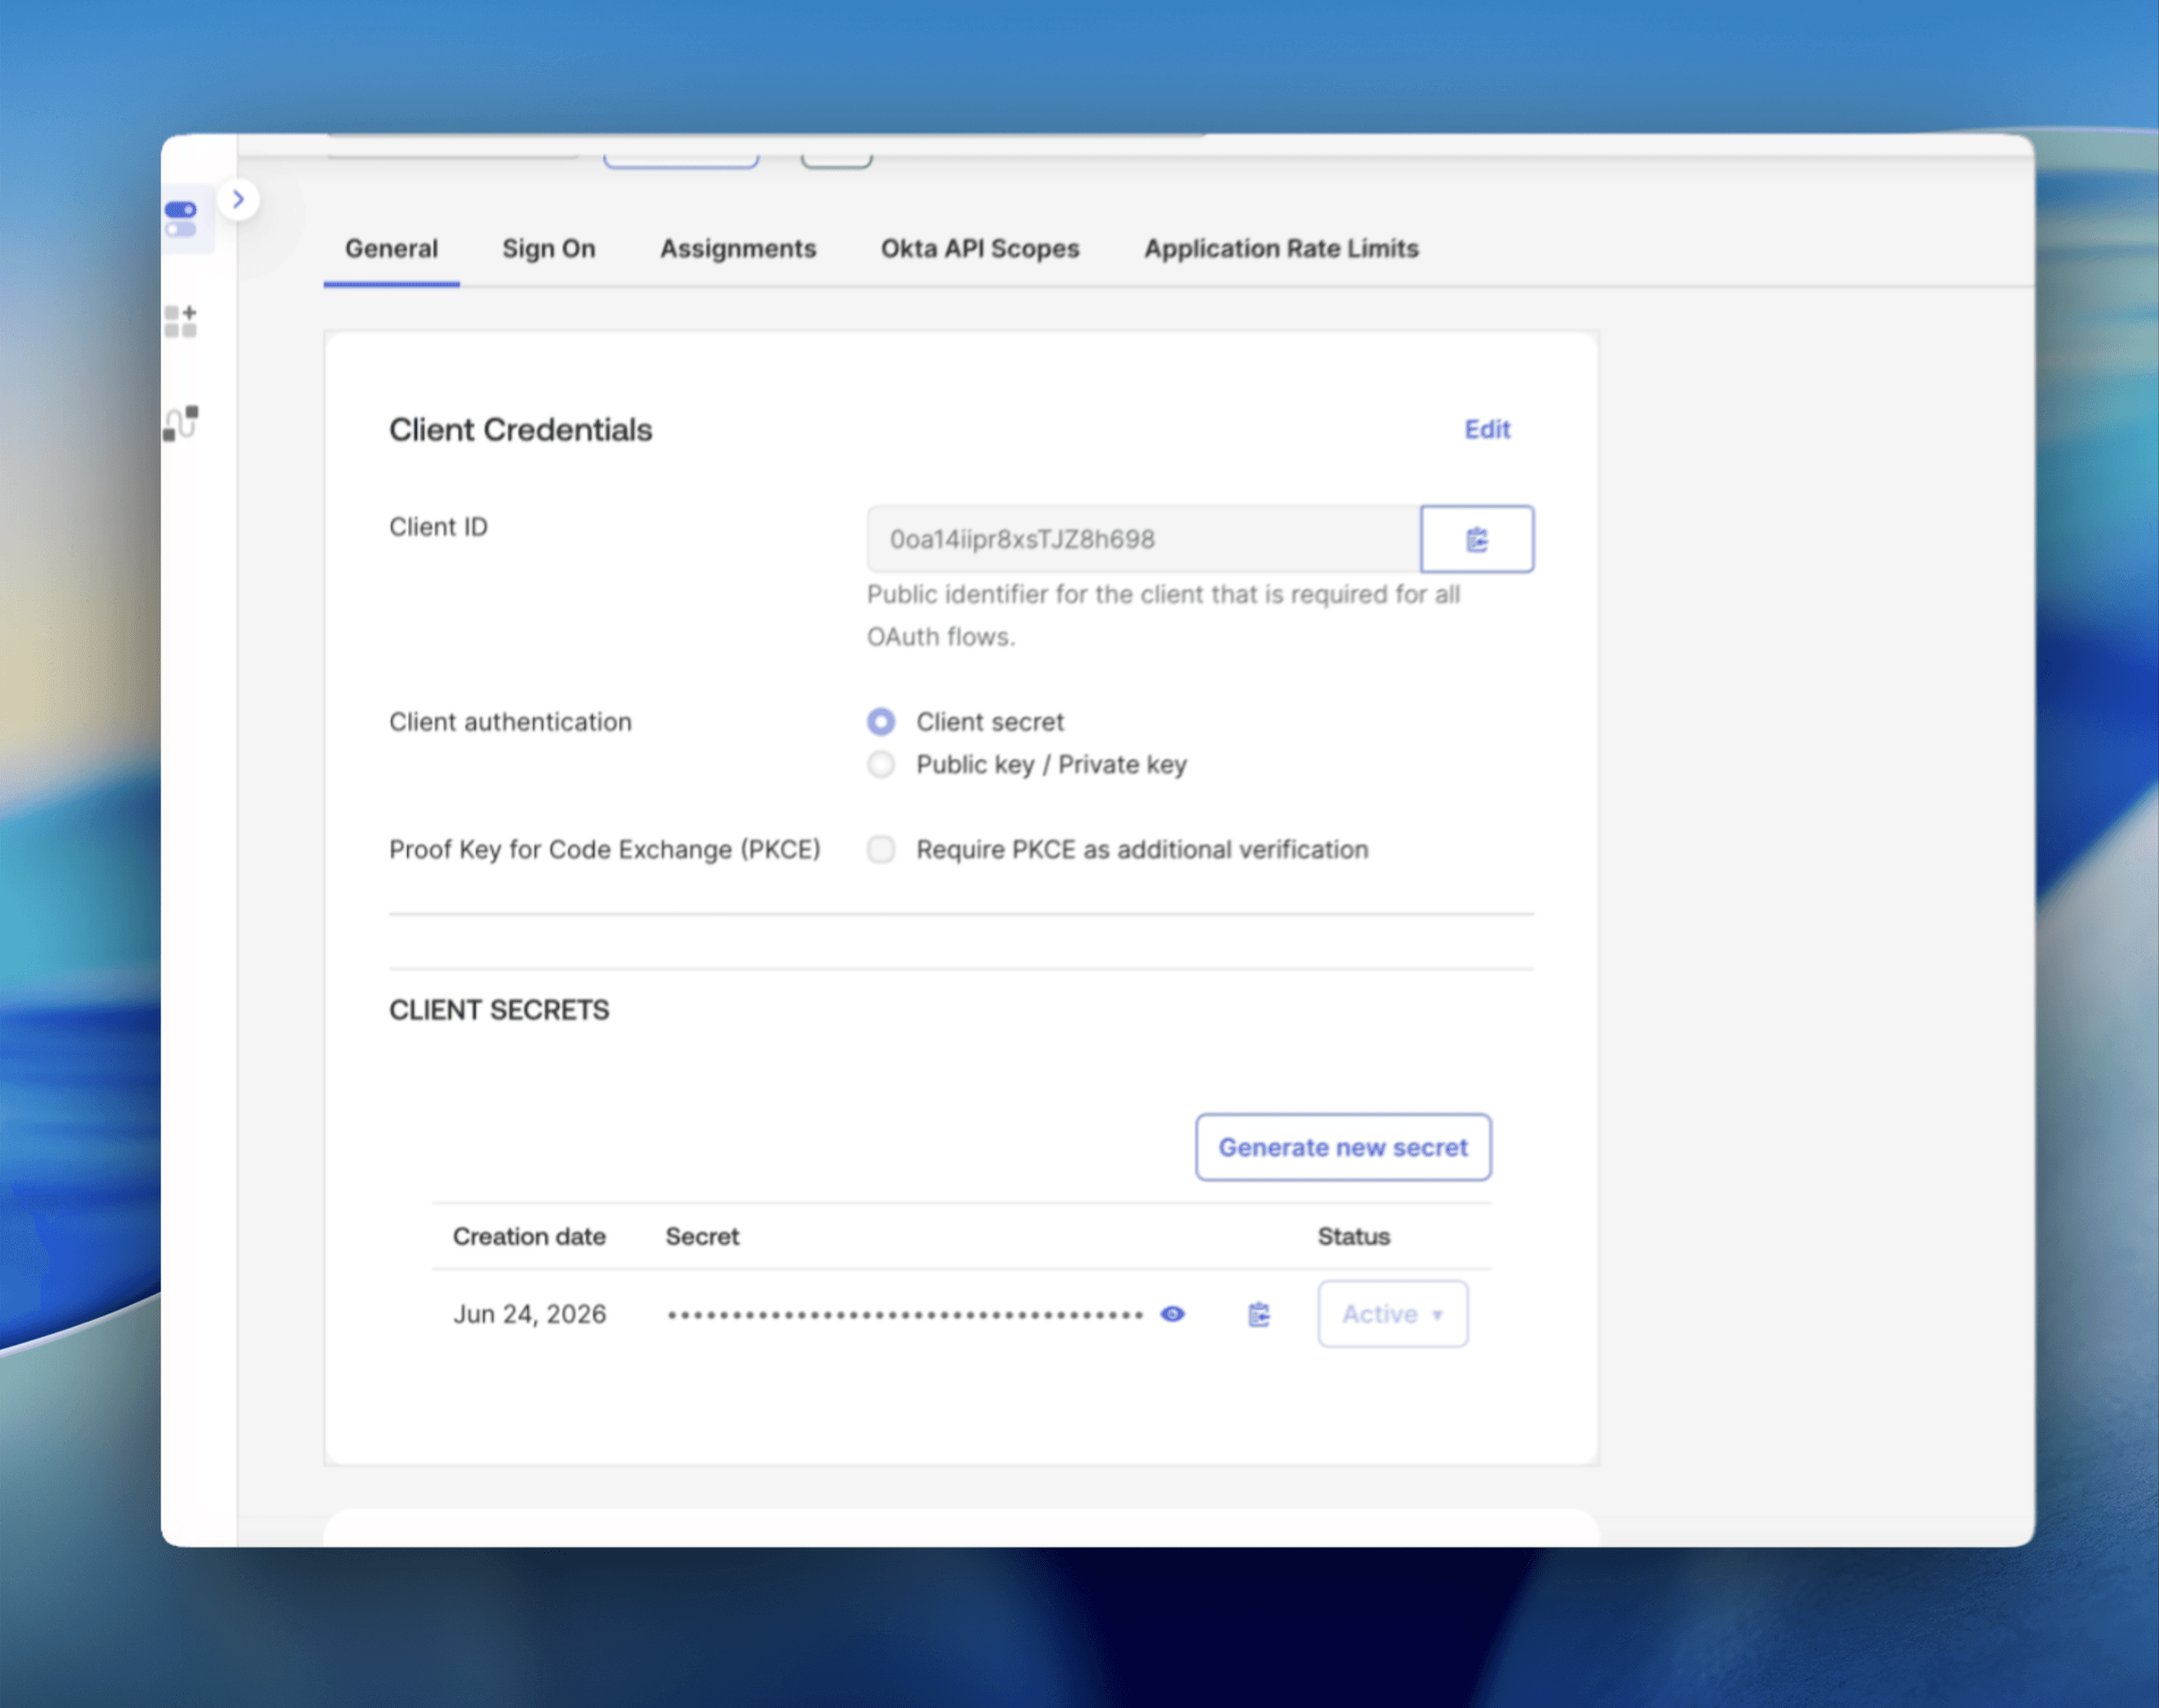
The General tab: copy the Client ID and client secret.
Info:
Okta gives you a choice of issuer. The org authorization server issuer is
https://<your-org>.okta.com; the built-in custom authorization server is
https://<your-org>.okta.com/oauth2/default. Use whichever matches the
authorization server you assigned the app to, and verify by opening
<issuer>/.well-known/openid-configuration.
Values for Proliferate
| Proliferate field | Value |
|---|---|
| OIDC issuer URL | Issuer URI from Okta (e.g. https://dev-12345.okta.com) |
| OIDC client ID | Client ID from the General tab |
| OIDC client secret | Client secret from the General tab |
| OIDC scopes | openid email profile |
| Token auth method | Client secret basic |
Finish in the SSO settings: paste the values above, Save, Test, then Enable.