Microsoft Entra ID
Register a Microsoft Entra ID (Azure AD) app for Proliferate SSO.
Use a Microsoft Entra ID app registration to sign in to Proliferate with OpenID Connect.
Prerequisites
- An Entra directory (tenant) in which you can register applications. A personal Microsoft account with no directory cannot register apps; create a directory first (e.g. via an Azure free account or the Microsoft 365 Developer Program).
- The Redirect URI from your Proliferate Single sign-on settings.
Register the application
- In the Microsoft Entra admin center (or the Azure portal), go to Identity → Applications → App registrations and click New registration.
- Enter a Name (e.g.
Proliferate SSO) and choose the Supported account types that fit your organization (Single tenant is typical). - Under Redirect URI, select platform Web and paste the Redirect URI copied from Proliferate.
- Click Register. From Overview, copy the Application (client) ID and the Directory (tenant) ID.
- Go to Certificates & secrets → Client secrets → New client secret, set an expiry, and copy the secret Value (shown once).
- Go to Token configuration → Add optional claim, choose token type ID, check email, and Add. When prompted, also turn on the Microsoft Graph email permission so the claim is included in the token.
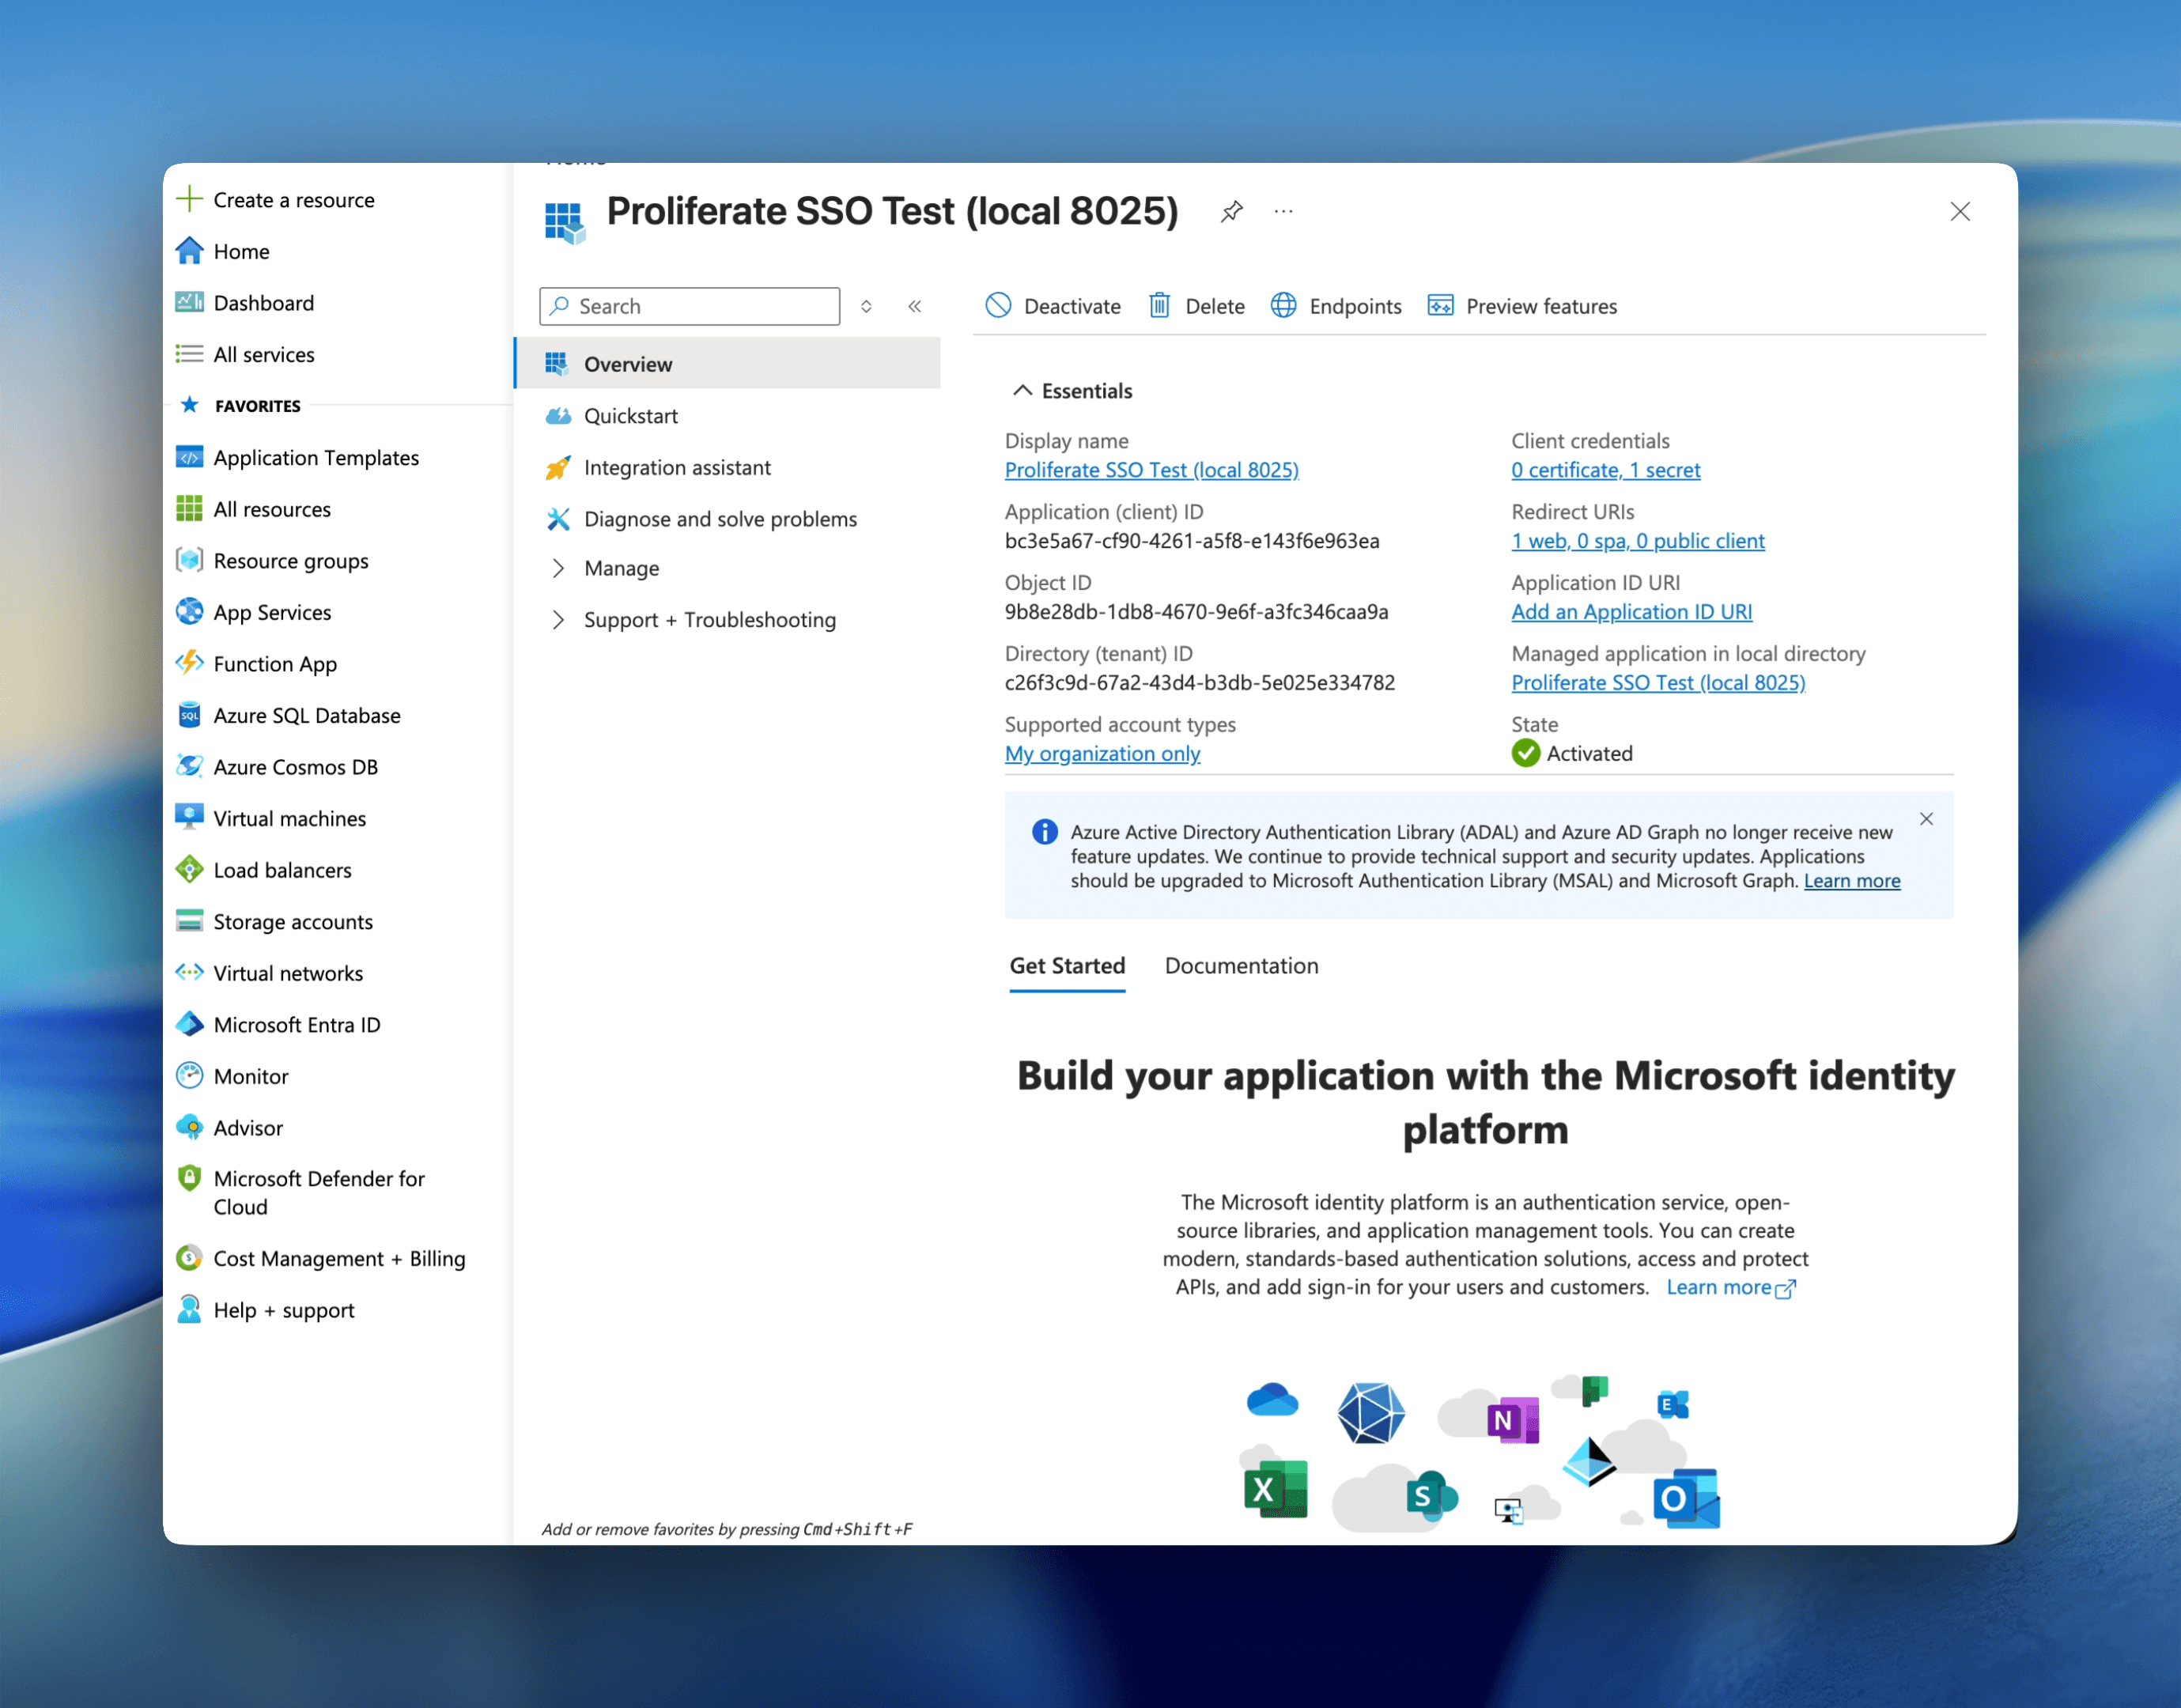
The app registration Overview: copy the Application (client) ID and Directory (tenant) ID.
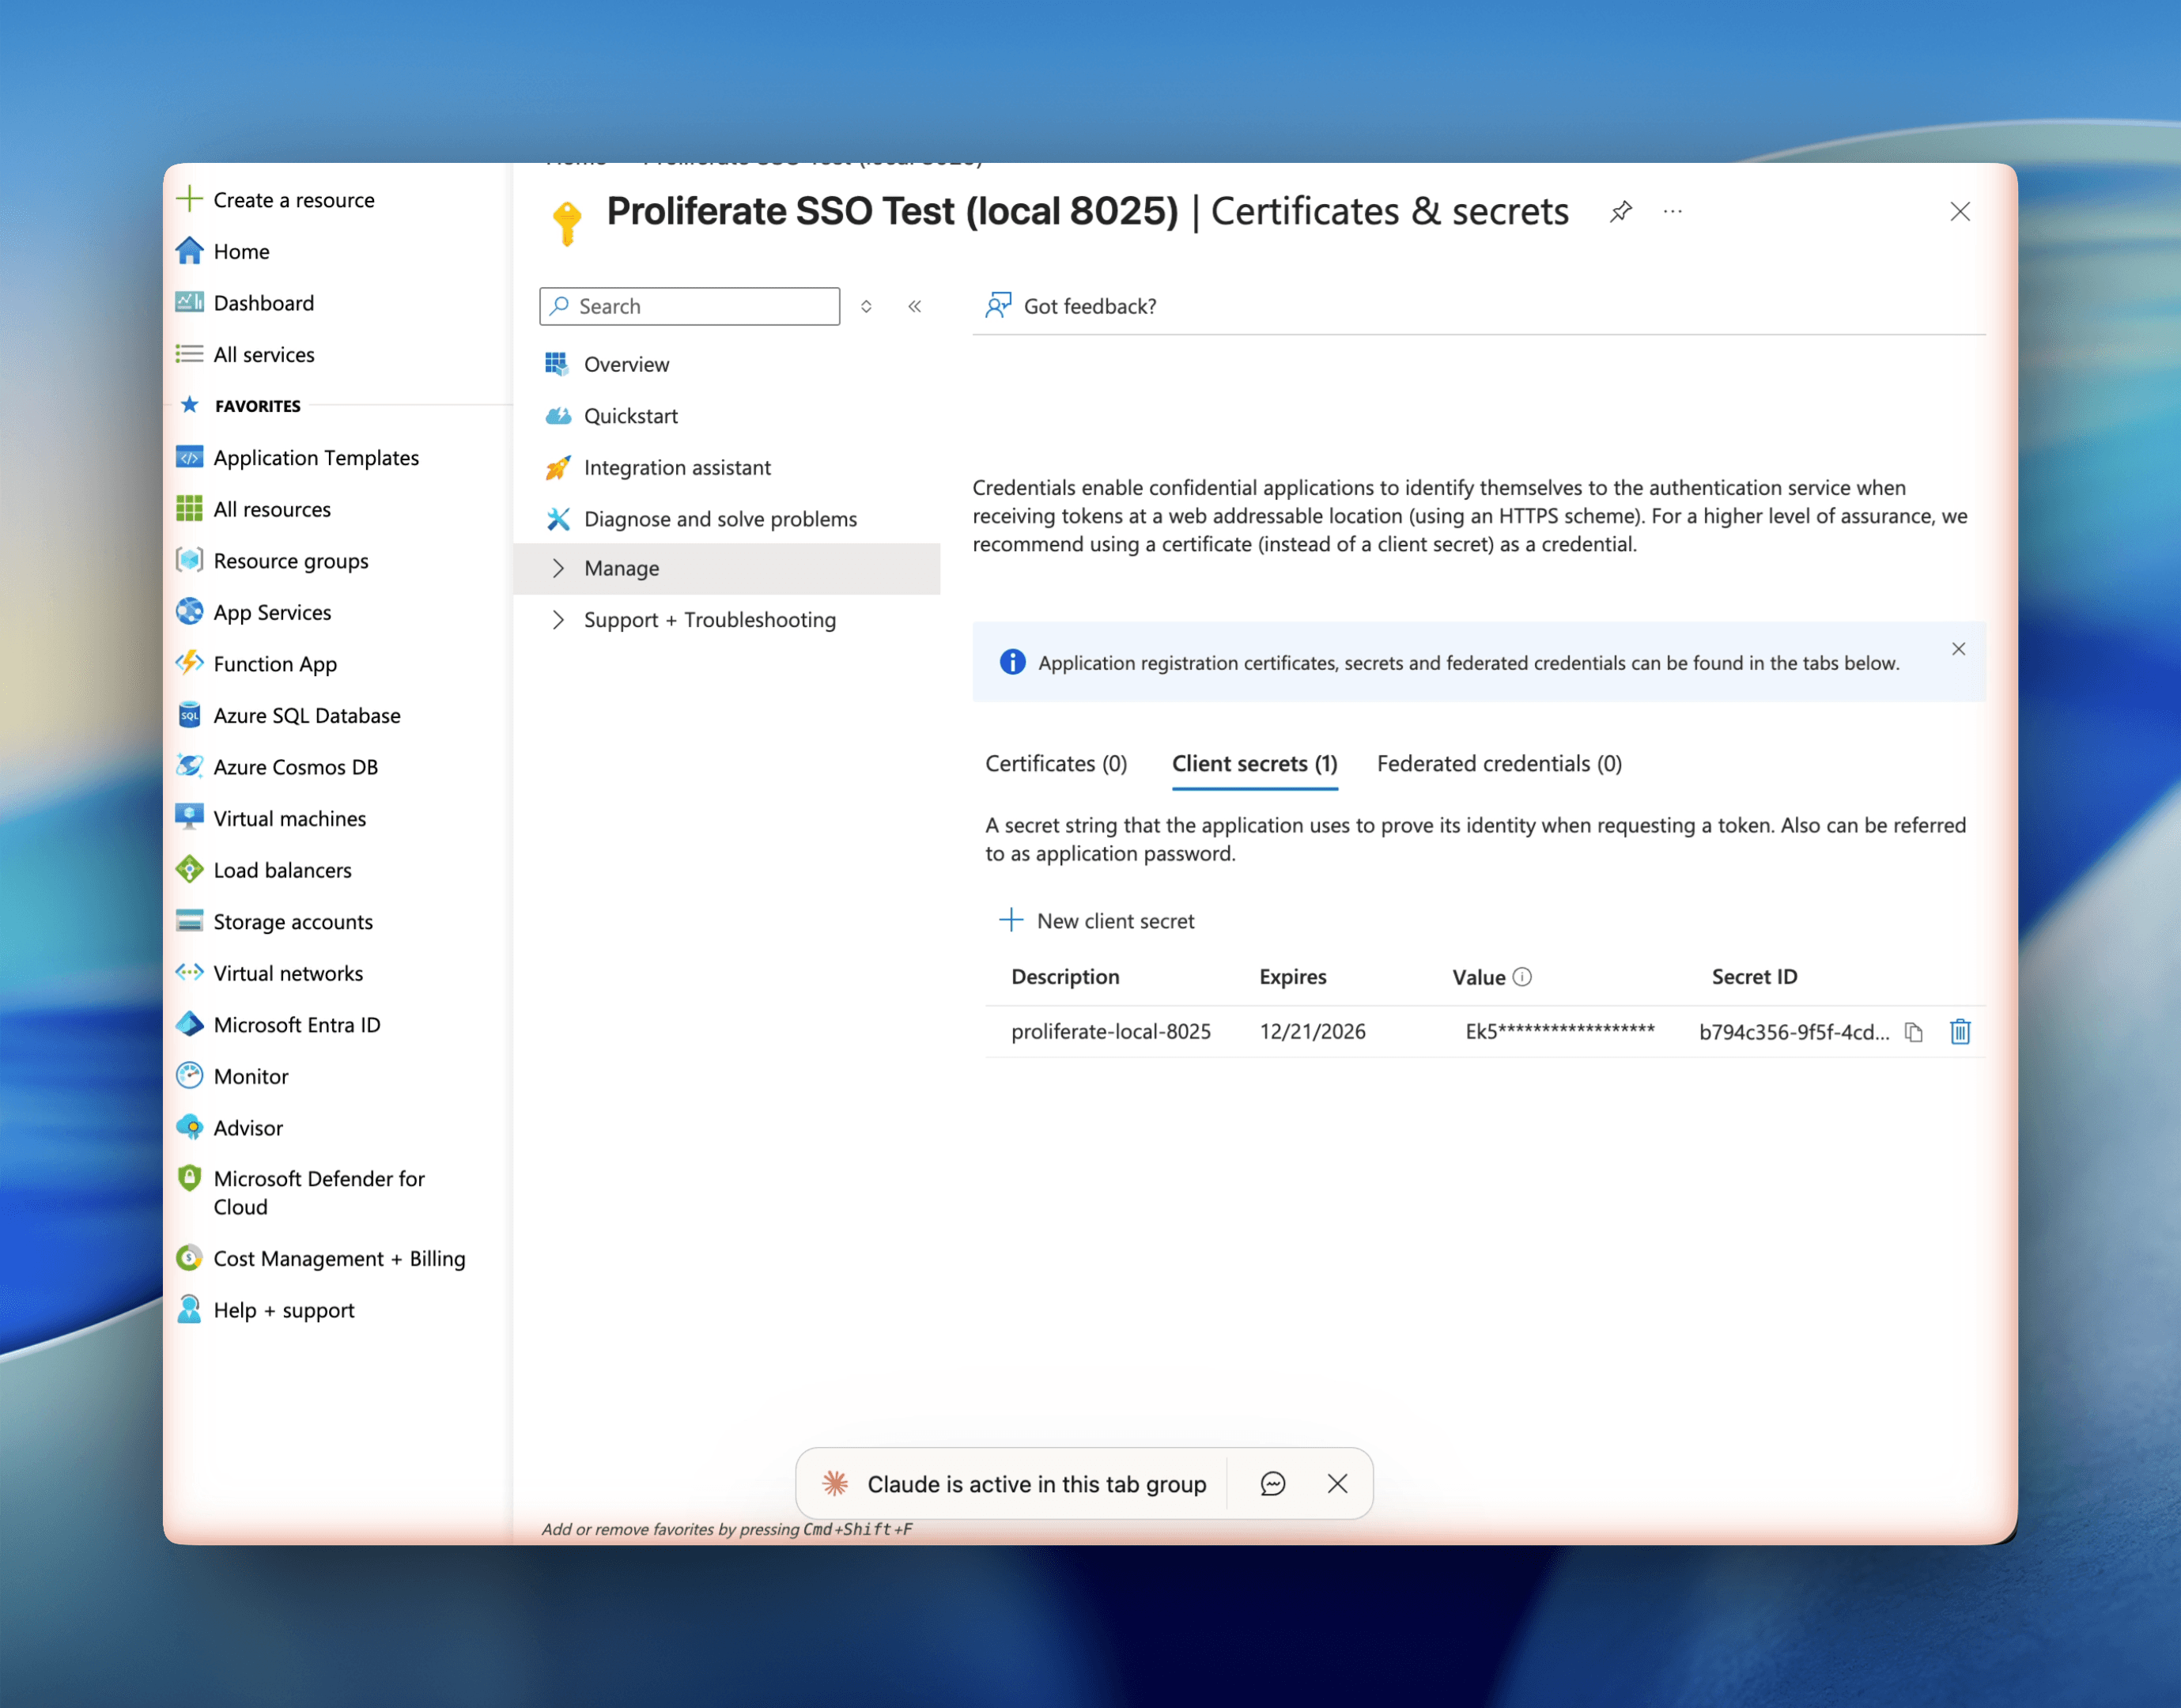
Create a client secret under Certificates & secrets and copy its Value.
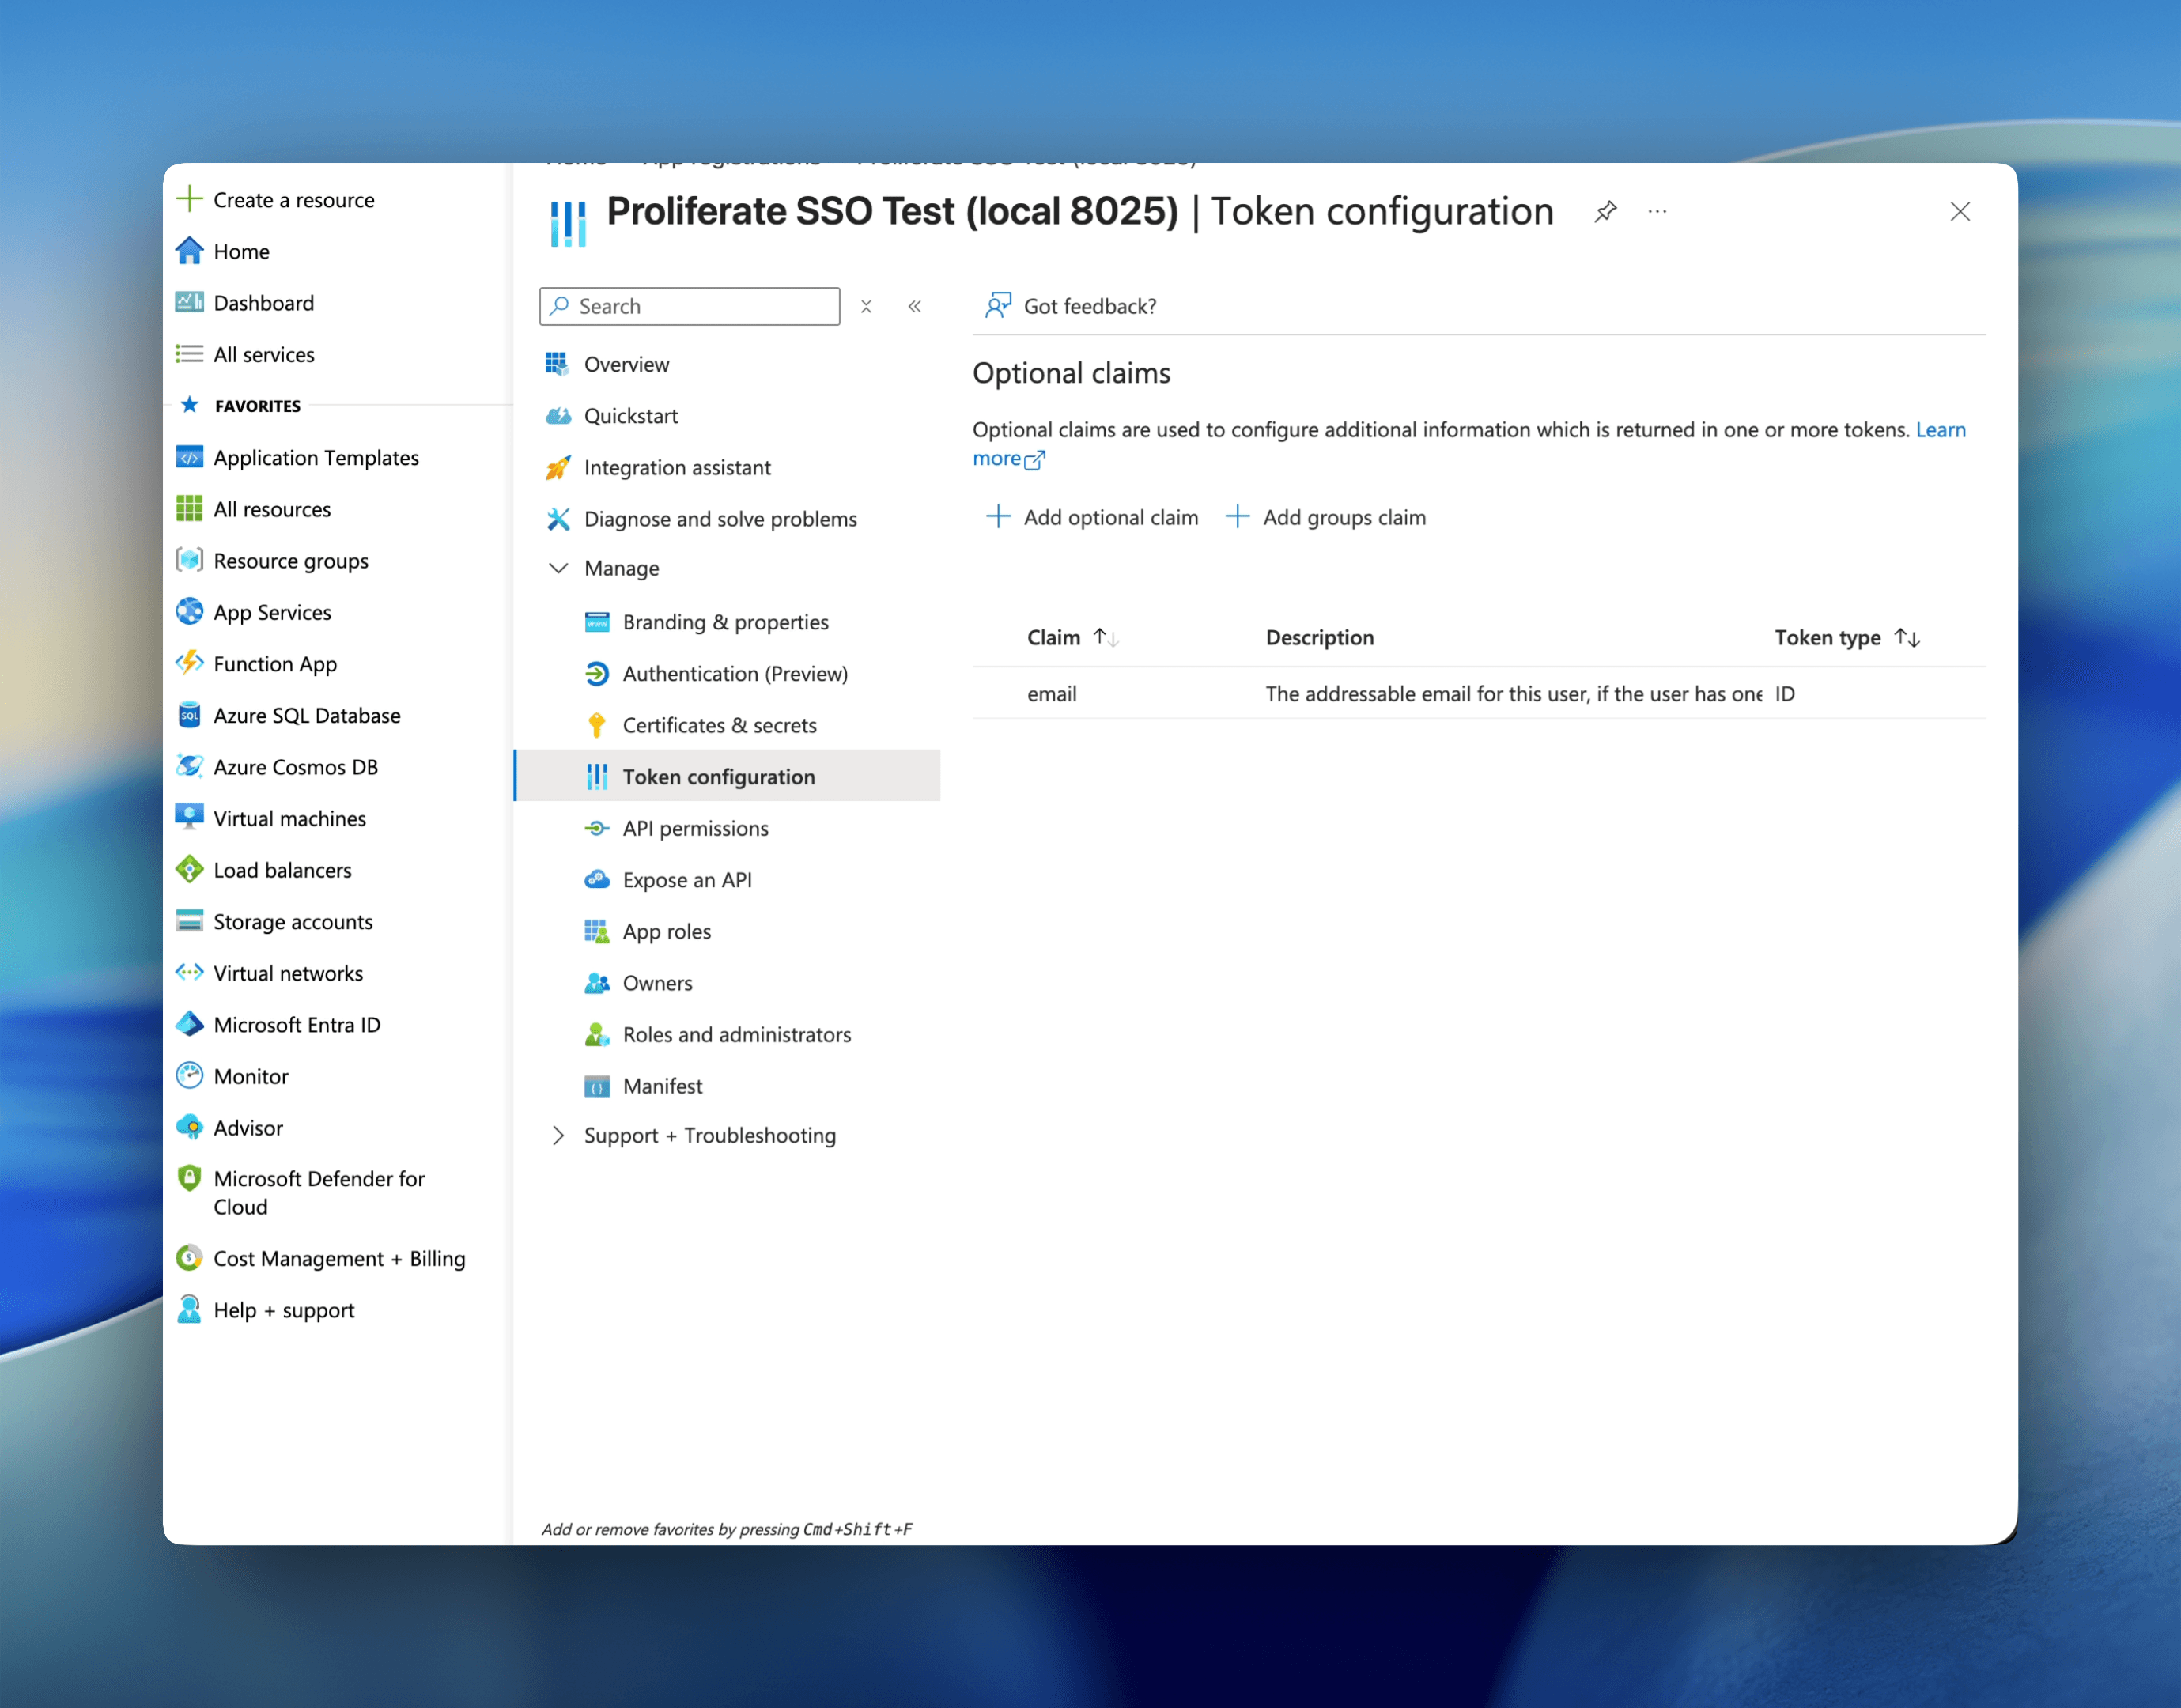
Add email as an optional claim on the ID token under Token configuration.
Entra rejects http://127.0.0.1 for a Web redirect URI; it accepts only
https:// or http://localhost. For local testing, register
http://localhost:8025/auth/sso/oidc/callback and reach Proliferate via
localhost (not 127.0.0.1) so the redirect matches.
Values for Proliferate
| Proliferate field | Value |
|---|---|
| OIDC issuer URL | https://login.microsoftonline.com/<tenant-id>/v2.0 |
| OIDC client ID | Application (client) ID |
| OIDC client secret | Client secret Value |
| OIDC scopes | openid email profile |
| Token auth method | Client secret basic |
You can confirm the issuer at
https://login.microsoftonline.com/<tenant-id>/v2.0/.well-known/openid-configuration.
The email claim only appears if the signing-in user has a verified email on
the tenant. The optional claim and Graph email permission added above ensure
it's requested.
Finish in the SSO settings: paste the values above, Save, Test, then Enable.